Available types
Notes on the equipment of the CRESSON Journey
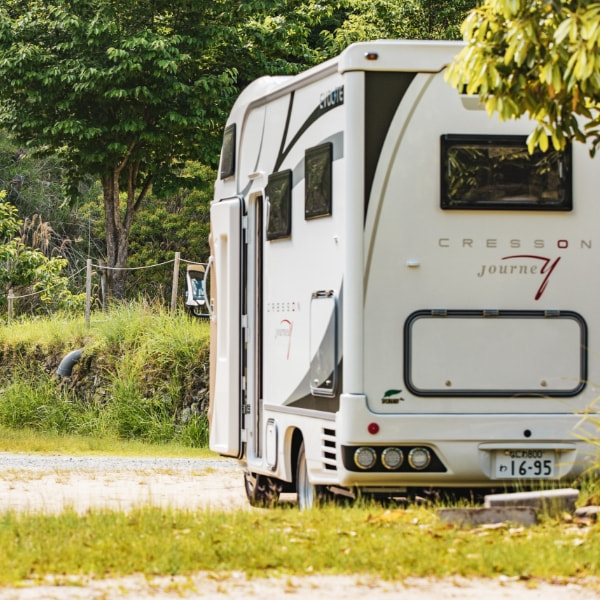
- Rental camper Osaka Top
- Available types
- CRESSON Journey TypeX
- Notes on the equipment of the CRESSON Journey
Notes on the equipment
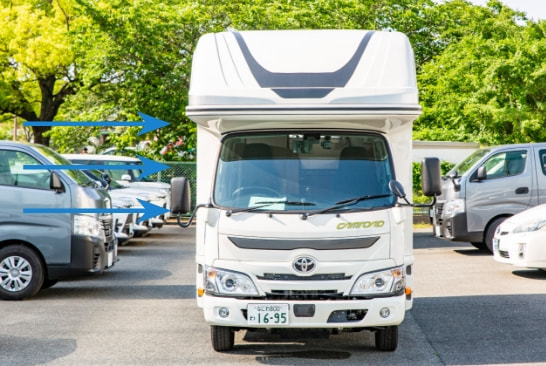
Vehicle size
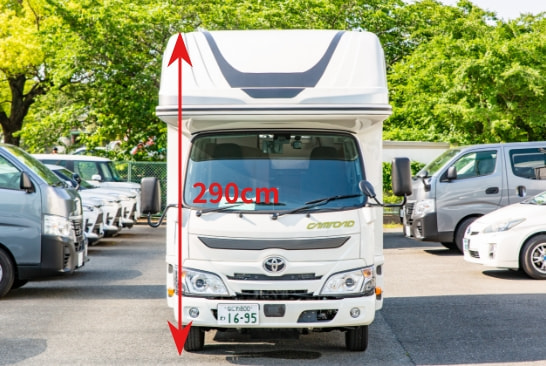
Height of the vehicle
The height of the vehicle is 290 cm.
Before passing below aerial wiring or through a tunnel, be sure to confirm the clearance.
This is the No. 1 cause of accidents. The danger will mount when you get used to driving the vehicle.
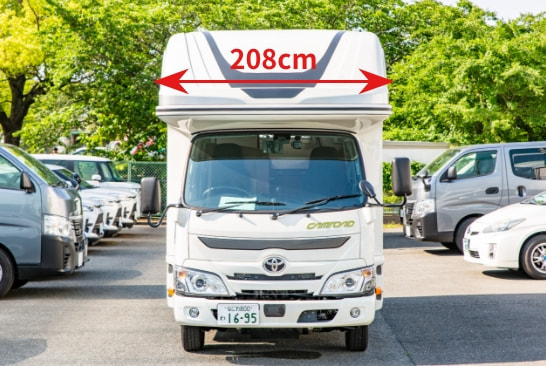
Width of the vehicle
The width also calls for your attention.
The width is 208 cm. Never drive with the accessory window opened!
If the width of the vehicle increases, an accident of minor collision may happen.
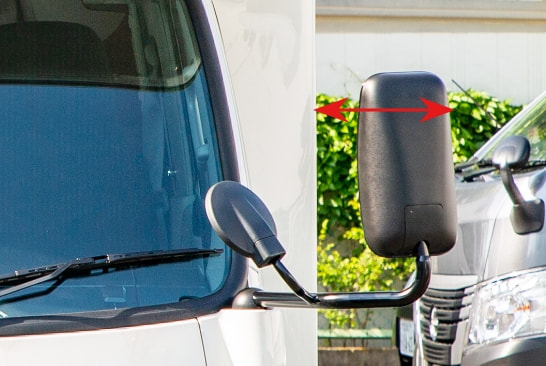
Width of the vehicle
Because the width of the accessory part is greater than that of the cabin, the width you feel from the cabin is different from the actual vehicle width.
If you drive with a sense of the width of the cabin, an accident of a minor collision may happen.
Notes during driving
Side wind
Because of the height and shape of the vehicle, the vehicle is likely to catch crosswinds. Be careful when driving in strong winds or passing over a large bridge.
The vehicle may turn over!
Center of gravity of the vehicle
Do not turn the steering wheel abruptly or suddenly slam on the brakes because the center of gravity is higher than that of a passenger car!!
The vehicle may turn over!
Locks during driving
Before driving, confirm that the exterior cable is put in the storage space, each window is locked, the cover of the roof ventilation is closed, the drawers and storage spaces are locked, and the load is secured.
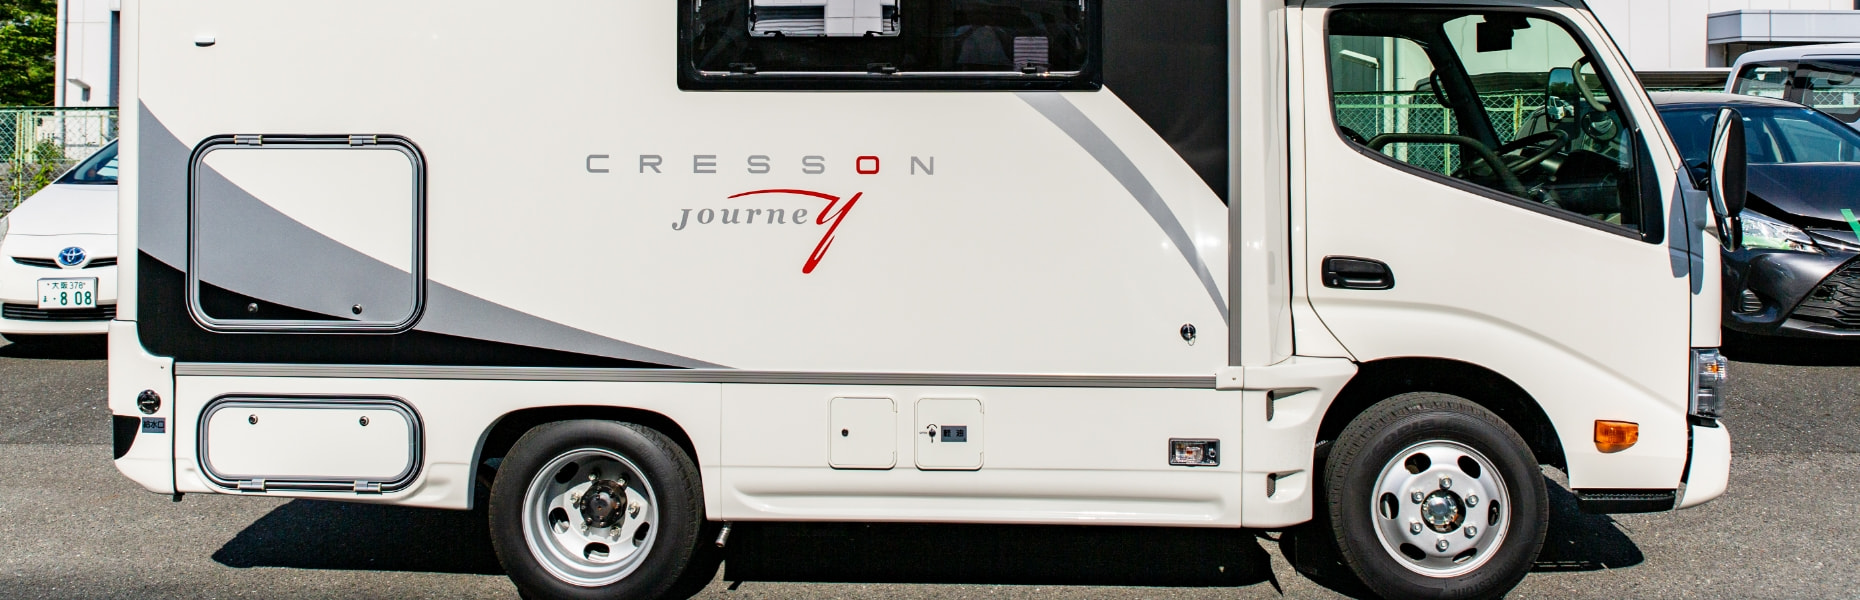
Description of exterior equipment
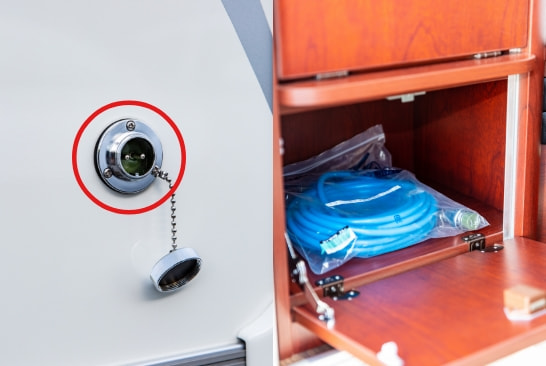
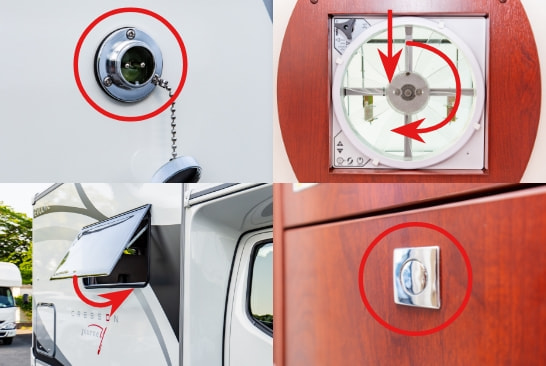
External 100 V power supply input
Use an exclusive cable.
The power supply can be charged from a household wall outlet.
Charge lamp
If the power supply is correctly connected and charged, the lamp above the AC outlet of the vehicle lights in orange. If the lamp remains dark, charging has not been completed.
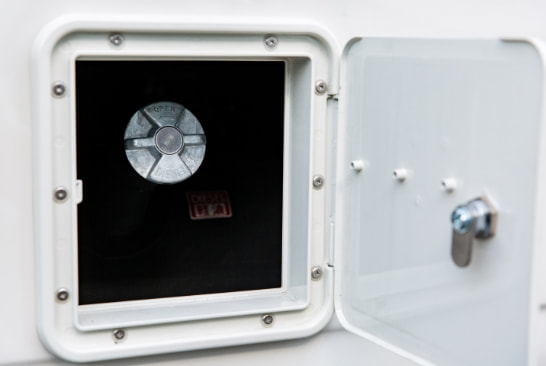
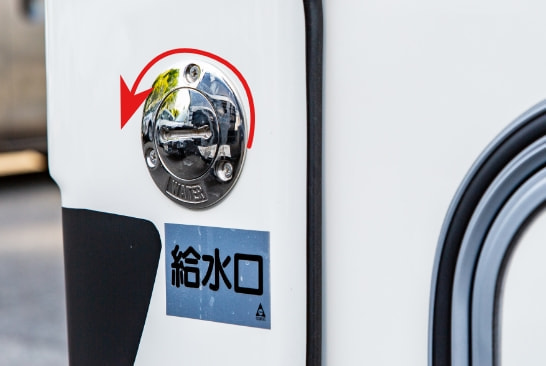
Description of position of the fuel inlet
The fuel inlet is at the lower part of the acrylic double window on the driver’s seat side.
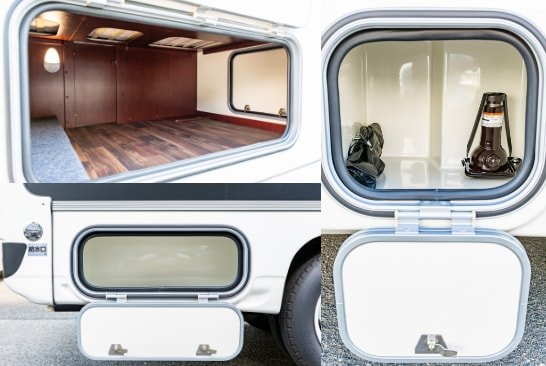
Exterior storage space
Exterior storage space is at two places. The storage space below the rear bed can be opened or closed at three places at the back of the vehicle and inside the vehicle.

Locking and unlocking methods
The storage space is unlocked when the key is pushed and turned in the direction indicated by the arrow. The storage space is unlocked when the key is turned 90°and the keyhole is in the vertical status.
Lock the space in the reverse procedure to above.
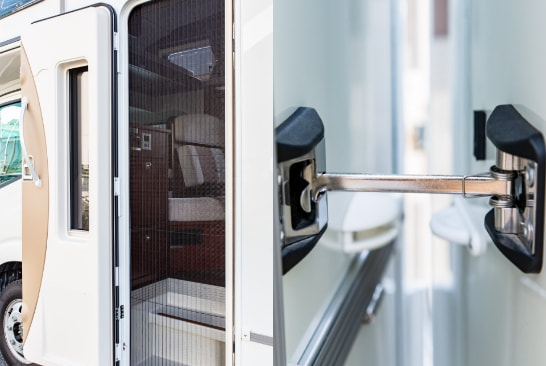
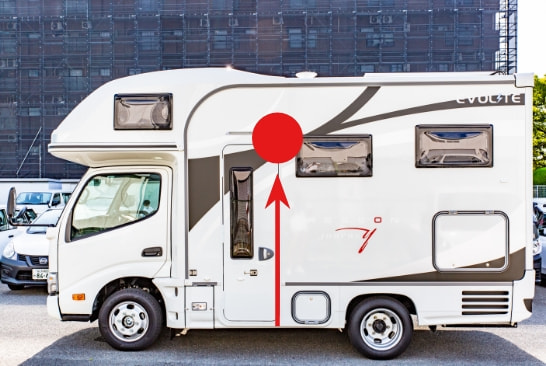
Entrance door
Interlocked with the remote-control key in the cabin The entrance door can also be locked from the inside
Take off your shoes.
When leaving the entrance door open, be sure to secure it with the hook. The door may suddenly close from wind gusts, causing injuries.
Automatic locking function
When leaving the entrance door open, be sure to secure it with the hook. The door may suddenly close from wind gusts, causing injuries.
Entrance and sub-battery
Shoes box storage
Take off your shoes inside the vehicle.
Exterior charging cable storage
The cable is stored below the shoebox.
Sub-battery
- Sub-battery capacity
-
The sub-battery can power the air conditioner for five to six hours in summer.
*The duration varies depending on the environment, frequency, and method of using the sub-battery.
- Charging the sub-battery
-
- External charging (The external charging cable is used)
Charging from external power supply equipment at campsite - Roof solar panel (installed on the roof of the accessory part)
Can be charged if there is sunlight. - Charging during driving
Charged by starting the engine and driving the car and increasing the number of revolutions of the engine
- External charging (The external charging cable is used)
- *The sub-battery may not be fully charged by the solar panel or by driving the car. It is basically recommended to charge by connecting it to the external power supply facility at the campsite.
Power switches and switches
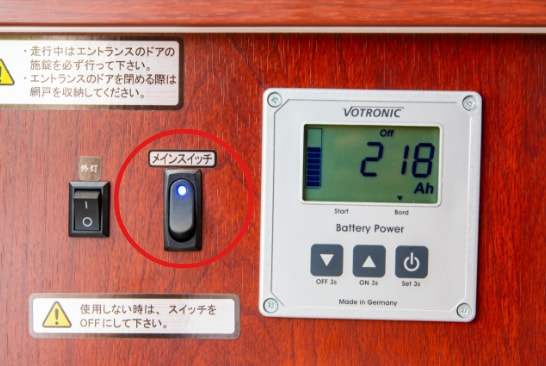
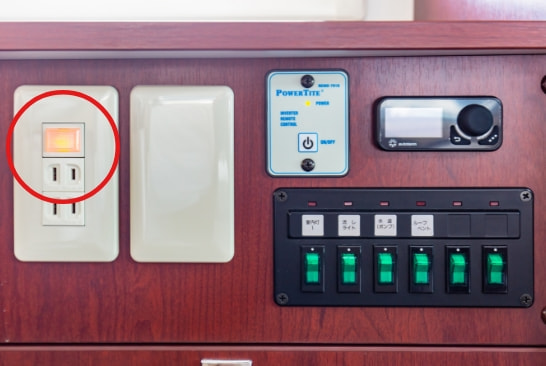
Main switch (main power)
This switch is above the left shoebox at the entrance.
It controls the power supplied from the sub-battery. To use the interior equipment of the vehicle, first turn this switch on.
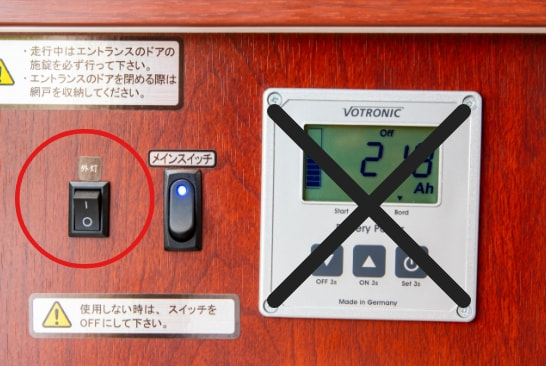
Exterior light switch
This is the switch for the light at the upper part of the door.
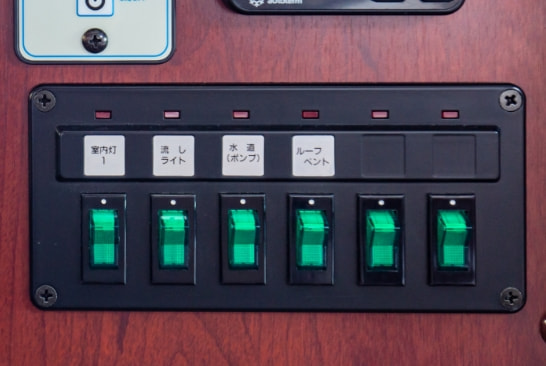
Intensive switch (at lower part of the sink)
This switch cannot be used unless the main switch is turned on.
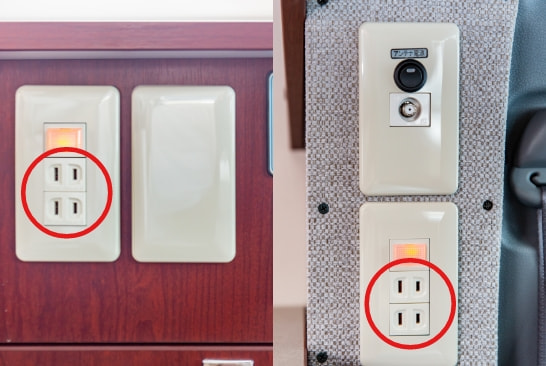
100 ACV outlets
One outlet is found at the lower part of the kitchen and another, on the left side of the entrance.
The capacity of these outlets is not as much as that of household outlets. If two or more appliances, such as a hair drier and the microwave oven, are used at the same time, the circuit breaker will trip.
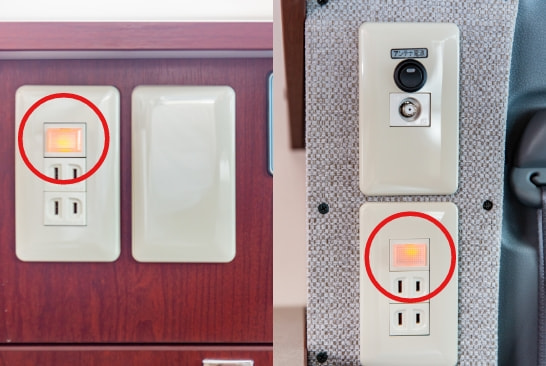
Connecting external 100 V power supply
When an external 100 V power supply is connected, the lamp above the outlet lights in orange. If it does not light, check the cable for the connection or the circuit breaker.
*When the lamp remains dark, it means that the battery has not been fully charged!
Position of the circuit breaker
The circuit breaker is below the second seat at the side of the assistant driver’s seat.
If any of the accessories cannot be used, check the circuit breaker.
If the electrical system cannot be used, the chances are the circuit breaker has tripped. If the electrical system still cannot be used after the circuit breaker is turned on, the power supply equipment at the campsite facility may be down. Confirm the facility.
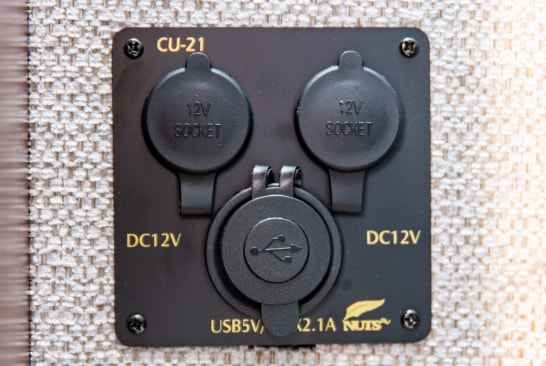
12 VDC outlet (back of the assistant driver’s seat)
Power is supplied to this outlet from the sub-battery.
This outlet is similar to the cigar socket of an ordinary passenger car.
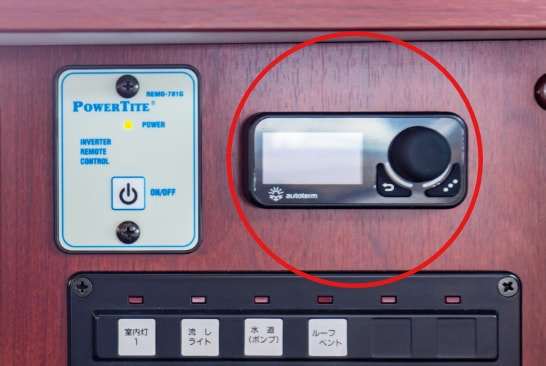
FF heater (at the lower part of the sink)
This is a heating appliance that uses the light oil of the vehicle.
It can be used even while the engine is stopped. Warm air will come out of the outlet at your feet. * Be sure to stop using this heater when refueling.
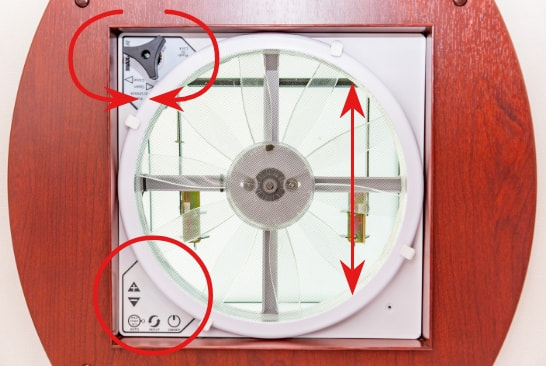
Roof ventilator
To use this ventilator, turn the lever and open the ventilator cover.
Letting air in or out can also be switched over.
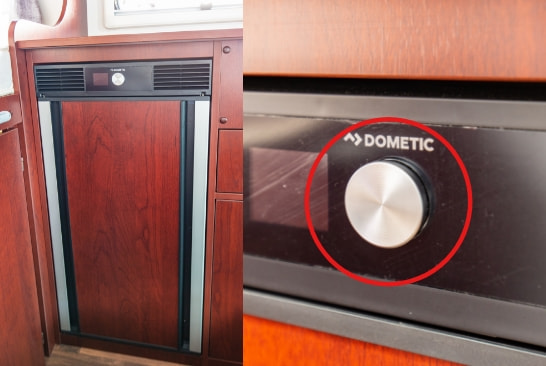
Refrigerator (below the sink)
Turn the refrigerator on or off by depressing the silver part.
The refrigerator can be used if the inverter is turned on even when the engine is not running. Note that the circuit breaker may trip if the refrigerator and microwave oven are used at the same time. The same holds true when using other high-output electrical appliances.
Seat & interior equipment
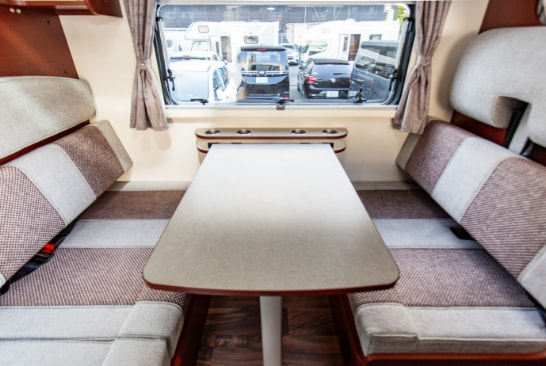
Dinette sofa/table
In addition to the driver and assistant driver, two passengers each can sit on these second and third seats when the car is traveling, which means a total of seven passengers can ride.
Dinette sofa at the side of the entrance
Do not use this sofa during driving!
It does not have a seat belt and is dangerous.
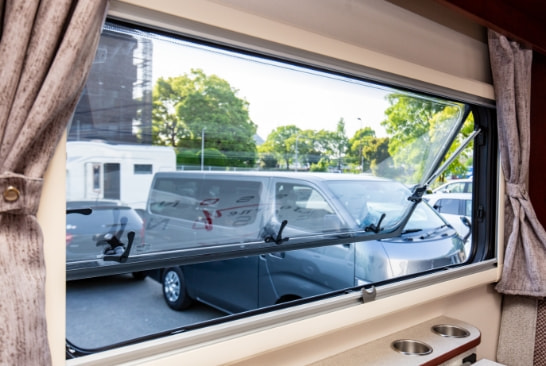
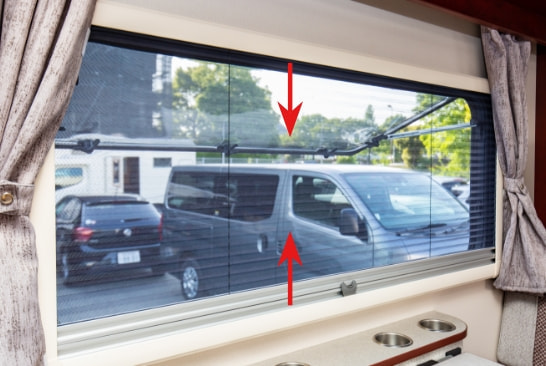
Double acrylic window
Do not open the window when driving!
The width of the vehicle extends, causing a minor collision.

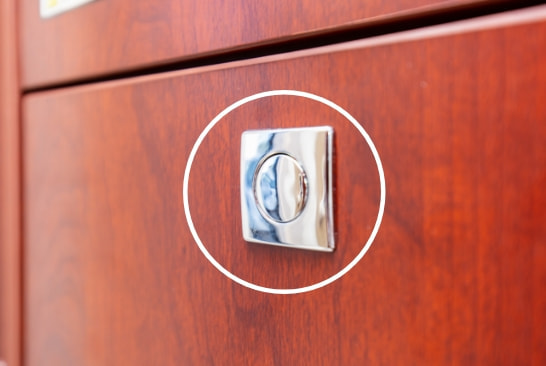
Unlocking of the window
Turn the lever 90 degrees while pressing the part 〇. The window will be unlocked and can be opened.
Do not open the window when driving!
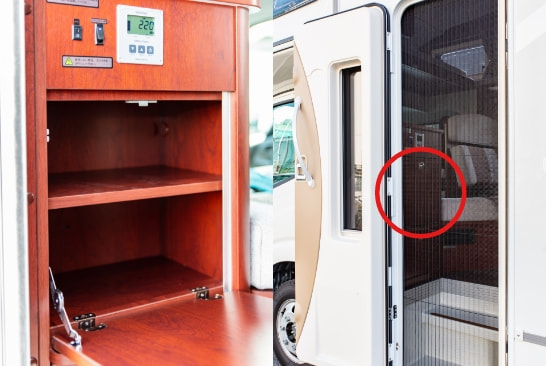
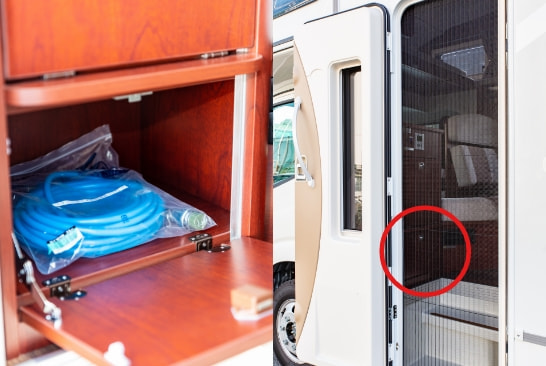
Insect repellent net and shade
The insect repellent net can be pulled out from the upper part of each window. The shade can be pulled out from the lower part.
Locking of storage space
Before driving, be sure to confirm that the door is firmly locked.
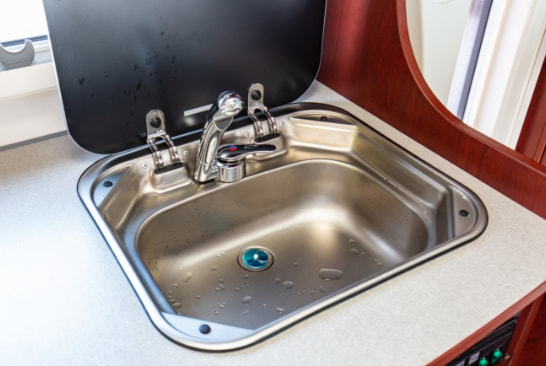
Kitchen (plumbing)
For how to use and notes on use, see “Kitchen & plumbing.”
Beds
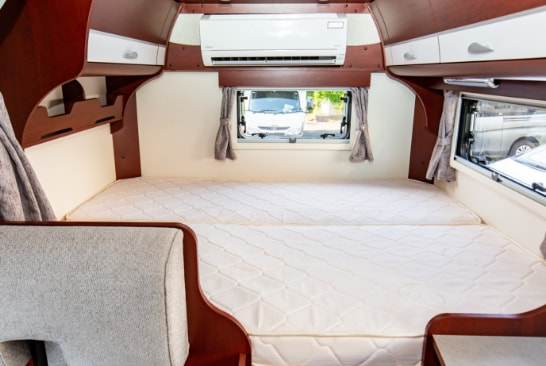
Rear bed (Two persons can sleep.)
Be sure to use bedding or a sleeping bag.
Do not sleep directly on the bed.
Size: 1,400 mm × 1,930 mm
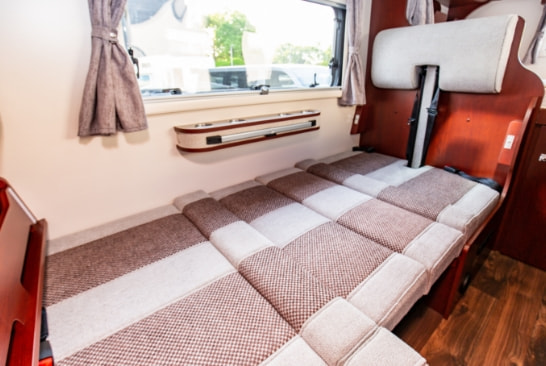
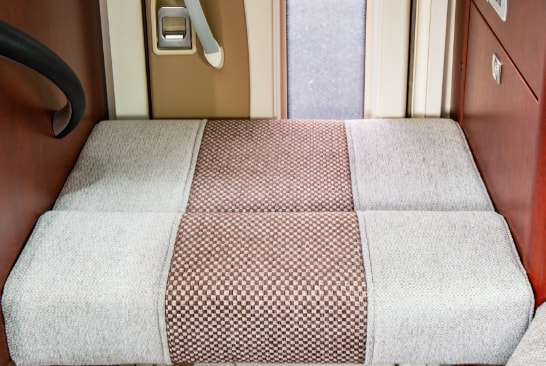
Dinette bed (One person can sleep.)
Be sure to use bedding or a sleeping bag.
Do not sleep directly on the bed.
Size: 1920 mm × 900 mm
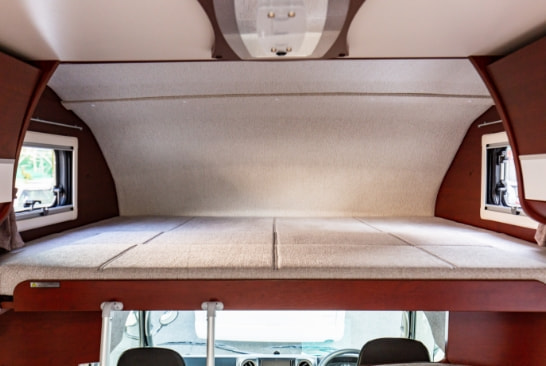
Bunk bed (Three persons can sleep.)
Be sure to use bedding or a sleeping bag.
Do not sleep directly on the bed.
Size: 1720 mm × 1,930 mm
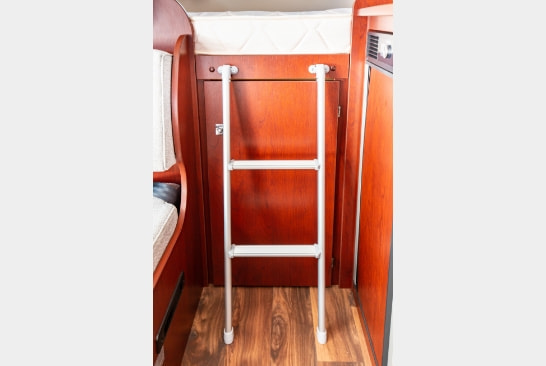
Ladder for the rear bed
Be sure to use the dedicated ladder when using the rear bed. There was a case of damage in the past! Do not climb on the kitchen!
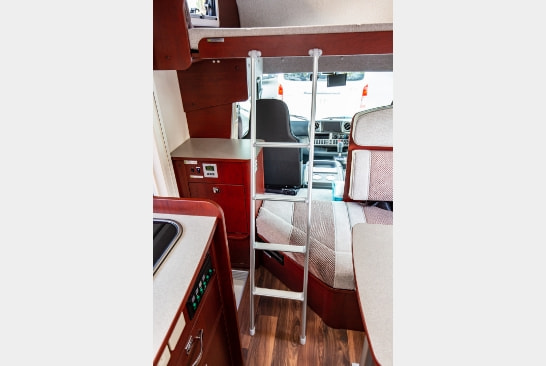
Ladder for bunk bed
Be sure to use the dedicated ladder when using the bunk bed. There was a case of damage in the past! Do not climb on the table!
Kitchen & plumbing
Water supply tank
A water supply tank is installed at the right rear part of the vehicle.
The capacity is 60 liters.
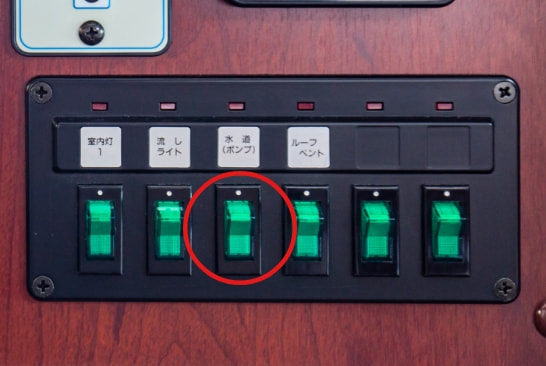
Water line pump switch
The water line can be used by turning on the water line pump switch at the lower part of the sink after the water supply tank is filled with water. (Hot water will not come out.)
*Turn off the pump switch after using water.
*Turning on the pump switch before supplying water to the tank may cause damage to and malfunctioning of the pump.
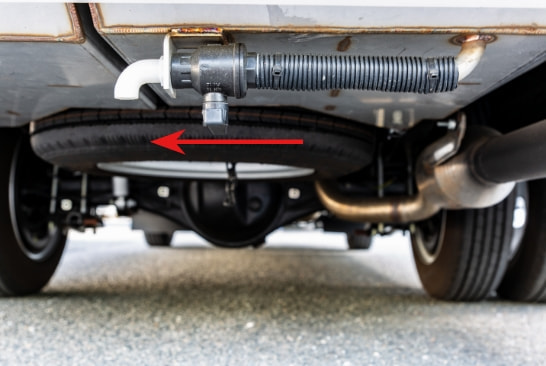
Water supply tank lever
Turn the left lever at the lower rear part of the vehicle. The water in the water supply tank can be used.
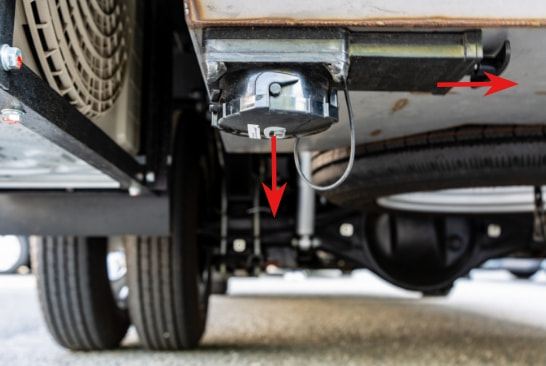
Draining water
The outlet is at the left of the lower rear part of the vehicle.
Remove the cap from the outlet and pull the lever. Wastewater will come out. Empty into a bucket.
*When the rental period expires, drain water from both the tanks and clean the tanks to restore them to the original status before the start of the rental, and return the vehicle to J-net Rent a Car.


Reservation & Contact us
Click this to ask a question by mail.


